Tuesday, September 22, 2015

Day 1-Watercolor for Card Makers-Exploring Mediums


It's been a while since I posted here, but life has, as always, been a little hectic.  I promise I will make every effort to keep up the posts here on a regular basis.  Besides, after the Somerset, NJ Scrapbook Expo, I've been really inspired.  

Ok, here goes.  I finally decided (after a full weekend of shopping) that I have enough craft supplies *for now* and will make every effort to use up my stash <- how else can I justify buying more?

Of course, that meant that I had to go out and buy water colors and water color paper to get me started.  That's the last purchase, I promise-don't hold me to it, I don't think that's a promise I can keep.

Last night I signed up for the interactive class "Watercolor for card makers-Exploring Mediums" on Online Card Classes.  I've only completed the videos from day 1, all SEVEN of them.  Talk about a fully loaded class!  This class is wonderful! I highly recommend it.  So I watched the videos last night, and went full throttle into the projects.  Below, you will see my version of Jennifer McGuire's card from day 1.  

I used what I had on hand: 

"Poppies" by Sheena Douglas 
"Up and Away" by Mama Elephant for the "Sending Smiles across the miles" sentiment
Zig ColorBrush Twin water based markers -Pool (blue), Peanut Butter (brown for stems), and a Red color whose name I can no longer read
Whispers - Gold tinsel Embossing Powder

I've had the markers for years-read more than 7 years- and I had no idea what they were for. Now I do, and wow, are they awesome! These markers are made by Kuretake Co. in Japan.  I'm assuming they are similar to the ones referenced in the class only these do not have a real brush tip. 

Zig ColorBrush Twin Markers


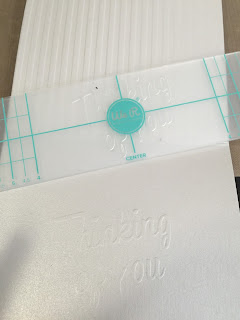
I embossed the card base on both the face of the card and the inside using the folders below and my Evolution Advanced.

Embossing folders

Embossed sentiment on the inside of the card

The best part about working on this particular project was that my son, Nico, worked right along side me. I plan on using his creations to make a card later today.  I'll post those pictures later.


Crafting Companion

The heat embossed image was not as clear as I would have liked, but it was definitely good enough for my first pass. Not bad for my first attempt at these techniques. I can't wait to see what else I learn in the class.  
Finished Product

I hope you share your creations with me as well. Happy crafting!


Monday, March 9, 2015

Heidi Swapp's Minc Foil Applicator

Heidi Swapp Minc Machine

I cannot stress enough how happy this little machine makes me! I was pushed down this slippery slope after Vicki Boutin's hilarious demonstration at Scrapbook & Cards Magazine's Crop & Create event in Markham, ON.  Heidi Swapp's new Minc Foil Applicator blew me away! Let me inform you that I purchased this machine on my own, and have not received anything for this review.  Now that that is out of the way....

OMG!!! This fantastic machine makes everything shinny and pretty! I'm not going to give you a full review because, quite honestly, I found that Taheera from the Fill Your Paper With The Breathings Of Your Heart blog did a marvelous job reviewing the new Minc Foil Applicator.  There's no need to reinvent the wheel. 

I'm still waiting for my shipment of foils from A Cherry on Top, but I've had fun with the seemingly small sheet of foil included with all Minc machines.   The Minc comes with a 6 X 12 in. sheet of gold foil as well as three beautiful tags ready to be foiled.   That seems like a small piece of paper, but the fact it is that it goes a loooong way. Take a look at the picture below showing how you can use your left over pieces on any project.  There's no need to use a whole sheet when only a small part of your tag is going to be foiled. 


The end result is beautiful!

These are the three tags that come with the Minc. 

Below, you will see there are an additional three items that have been foiled with the included 6 X 12 in. sheet (and there's still some left over).  These are items I printed on a laser printer at work. Yes, I admit it, I used the toner from work to test the Minc. I very rarely print personal items at work, but since the Minc requires laser toner for this process to work, it seemed like the most logical thing to do. Also everything is closed by the time I get back home so a photocopy at my local copy center isn't always a possibility. Now that I have tested it, I know I need a laser printer for home. 


Ok enough about that ethical dilema, I'm glad to see that the Minc truly does allow us to customize our designs.  There is no need to have a never ending supply of Heidi Swapp embellishments.  Don't get me wrong, they are gorgeous, and I would love to have them all, but they are sold out or on pre-order everywhere. At least the printer gives you the option of making your own embellishments.  I used my digital scrapbooking files to make the tags below. Unfortunately, I have no idea what kit or designer these came from, but I will upadte this post as soon as I figure out where they came from.

The final verdict is that the Minc is a very innovative and interesting addition to any crafter's toolbox.  

I would love to see any of your projects with the Minc.  It's so nice to share.  I will post more pictures when the rest of my foil arrives.  

**BTW, the machine retails for US$149, but has been sold for as low as $112.99 on Blitsy and $119 on MyCraftChannel so there is a possibility to get an even better deal than retail.

Saturday, March 7, 2015

Freebie-Stitched 3X4 Journaling Cards

Intro and a Freebie


Hello folks! I've decided that I would like to share some of the cut files I create for the silhouette.  These are .Studio files, and should work with either a Cameo or a Portrait.  These files are free for personal use.  Of course, they are simple because I create these for my own use. 

I'm not terribly savvy with this blogging business, but I'll try to update these files as much as I can.  

If you have any questions, please feel free to ask.   


Today's free file is a set of 3 3X4 stitched journaling cards for pocket scrapbooking.  These cards will be cut with the holes to stitch your design on it.  I find that stitching gives an added dimension, and that added handmade look.  Below is a sample of the finished product. 

Hope you like them, and get some use out of them. 

Thanks for stopping by! 

Natalia


Click Here for download